Back to articles
Installing Plugins on My Server
April 4, 2025
Minecraft
1. Open the RedHosting Control Panel
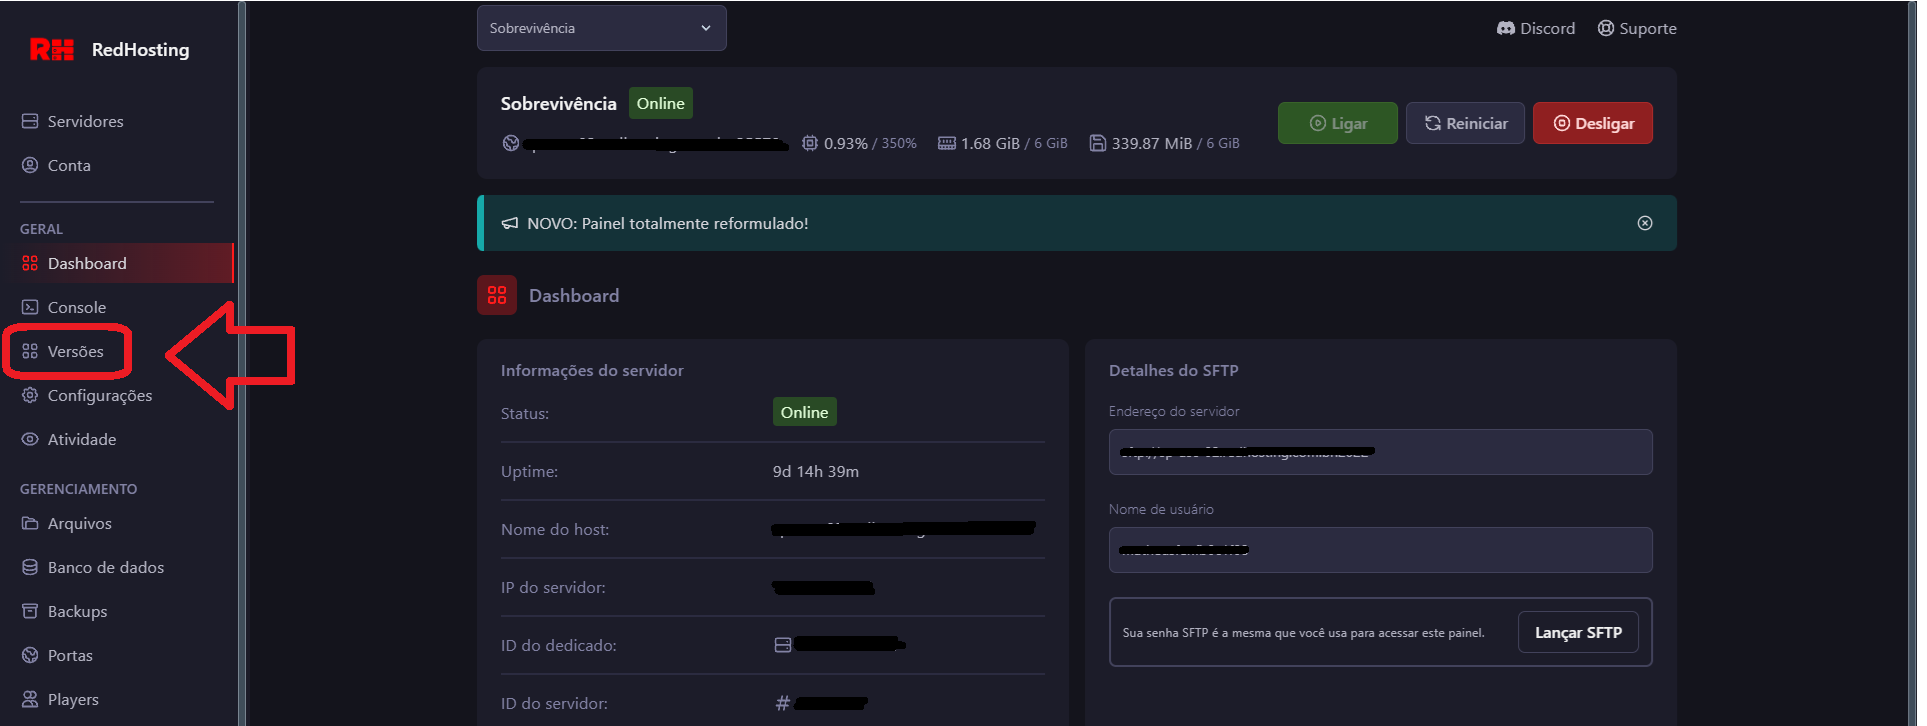
Open your server's control panel and go to the "Versions" tab ("Versões").
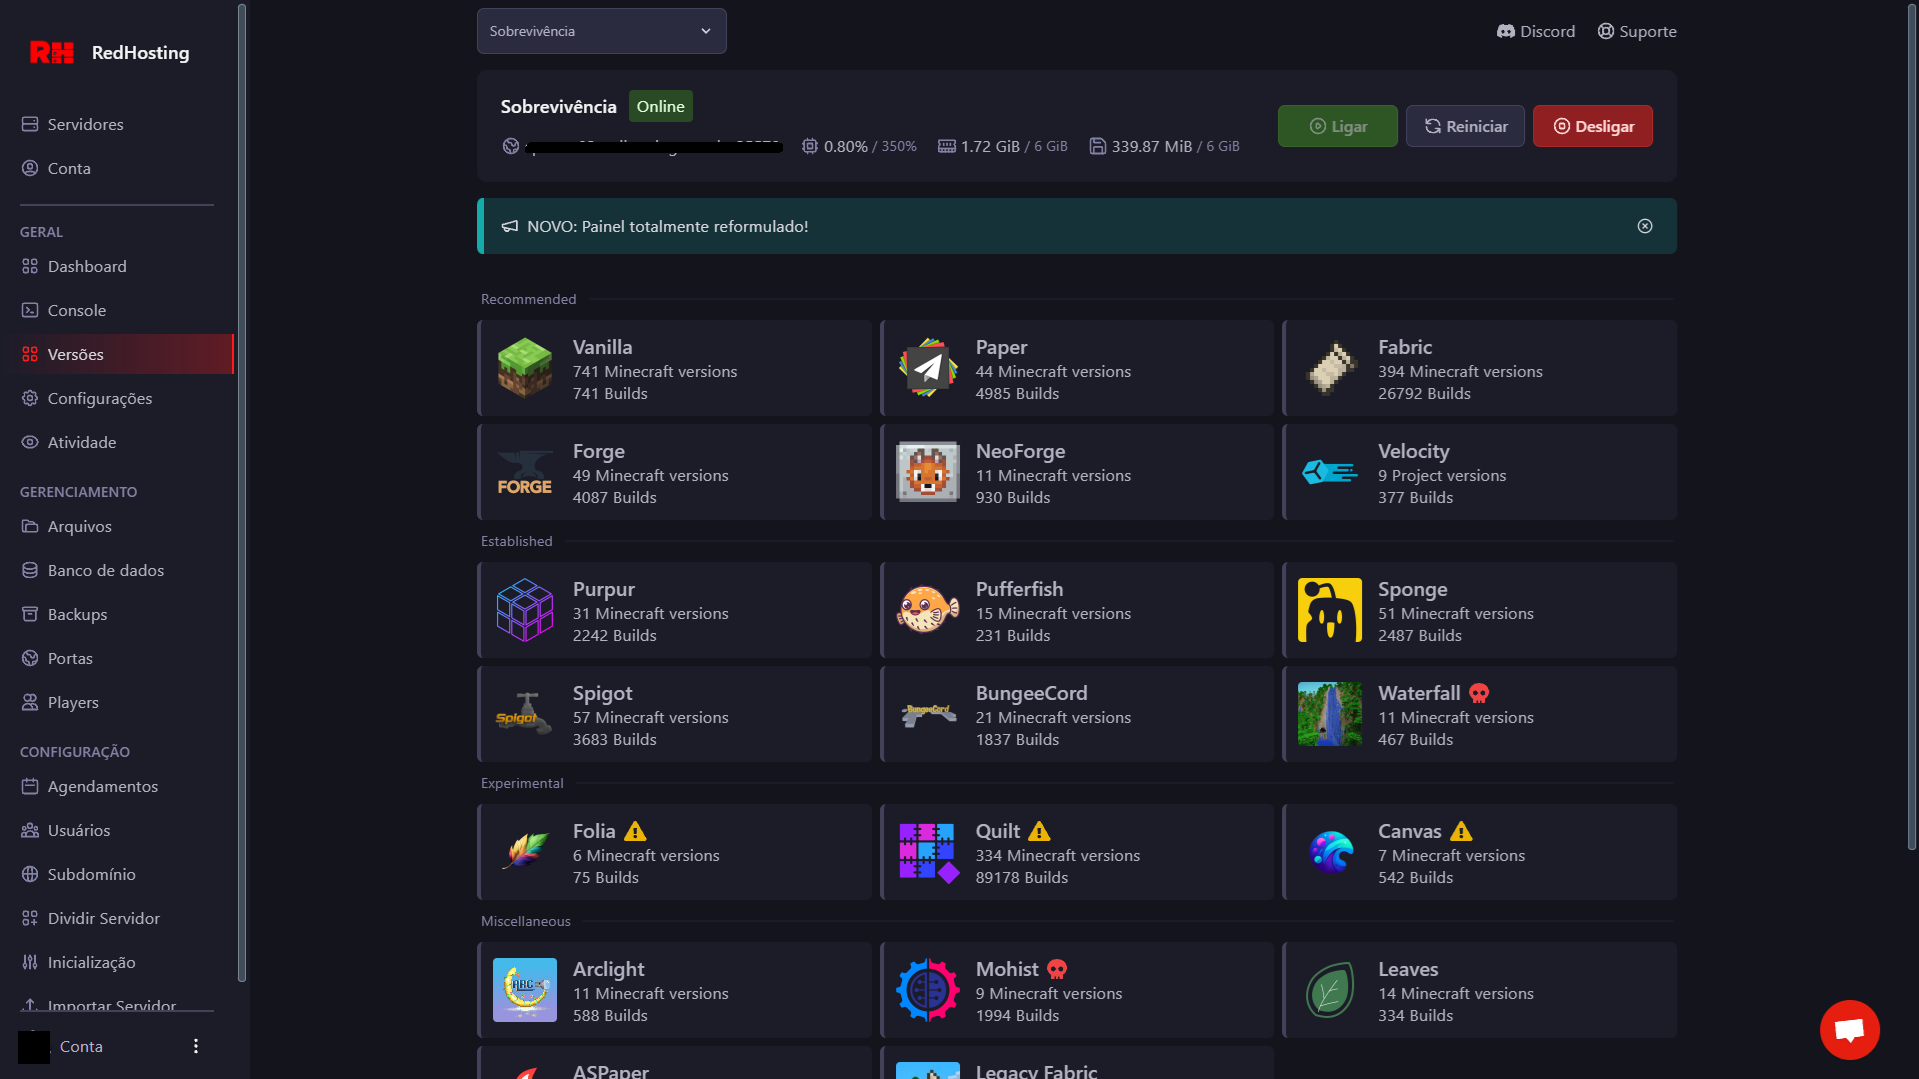
In this section you can choose which server version you want to run.
2. Choose a plugin-compatible version
Now you need to choose a server version that supports plugins. Examples of servers that support plugins:
- Paper
- Purpur
- Spigot
- Bukkit
Select one of these versions and click "Install".
3. Installing the right JAR file
After choosing and installing the server version you want, you'll see a JAR file being downloaded and installed on your server. This file is your server's "engine", and it must be plugin-compatible.
If you chose Paper, Purpur, Spigot or Bukkit, you're ready to start installing plugins!
4. Downloading plugins
Now that your server is ready for plugins, you can start installing them:
- Visit sites like SpigotMC or PaperMC to find plugins.
- Download the file of the plugin you want to install (usually a .jar file).
5. Adding the plugin to your server
- Go to the "plugins" folder in your server directory. If it doesn't exist, just create it.
- Put the plugin's
.jarfile inside the "plugins" folder. - Restart the server to load the plugin.
6. Checking that the plugin was installed correctly
ℹ️
After restarting, the plugin should load automatically. You can check that it's working by running the plugin's command in the server chat or by looking at the console for messages showing the plugin was loaded.
7. Common problems
- If the plugin doesn't work, check that you chose the right server version. Some plugins may not be compatible with older or newer server versions.
- If the server freezes or throws errors, check the console for errors or read the plugin's documentation.
Frequently asked questions
Where do I put the plugin's .jar file? +
In the plugins folder, at the root of the server. The plugin only loads on the next startup — uploading the file while the server is running does nothing until you restart.
The plugin doesn't show up in the list after restarting. Why? +
It's almost always a version mismatch: the plugin was built for a different Minecraft version than the one the server runs. The console shows the exact reason at startup.
Do I need Spigot or Paper to use plugins? +
Yes. The official (Vanilla) server doesn't load plugins. Paper is the most common choice, since it's Spigot-compatible and performs better.